Home Data Center Project: Adding a storage server
The following is part of a series of posts called "Building a data center at home".
Living in the SF bay area, you can acquire 2nd hand data center equipment relatively cheap. The following are a series of posts detailing my deep dive in building a cluster with data-center equipment at home (often called a homelab) which consists of 48 CPU cores, 576Gb RAM, 33.6TB storage across 60 x 6Gb/s HDD's with a combined weight of just over 380lb/170kg within a budget of $3000.
- Home Data Center Project: Starting the build - 7 September 2019
- Home Data Center Project: Adding a storage server - 21 September 2019
- Home Data Center Project: Formatting NetApp drives for normal use - 21 September 2019
- Home Data Center Project: Reduction of noise on Isilon X400 - 28 September 2019
- Home Data Center Project: Wiping and configuring Force10 switch - 5 October 2019
- Home Data Center Project: Load balancing multiple ethernet ports - 26 October 2019
- Home Data Center Project: Setting up a VMware vSphere ESXi 6.7 on Dell R610 - 6 November 2019
- Home Data Center Project: Persistent kernel panic and upgrading R710 BIOS - 23 November 2019
- Home Data Center Project: Finished System - 29 November 2019
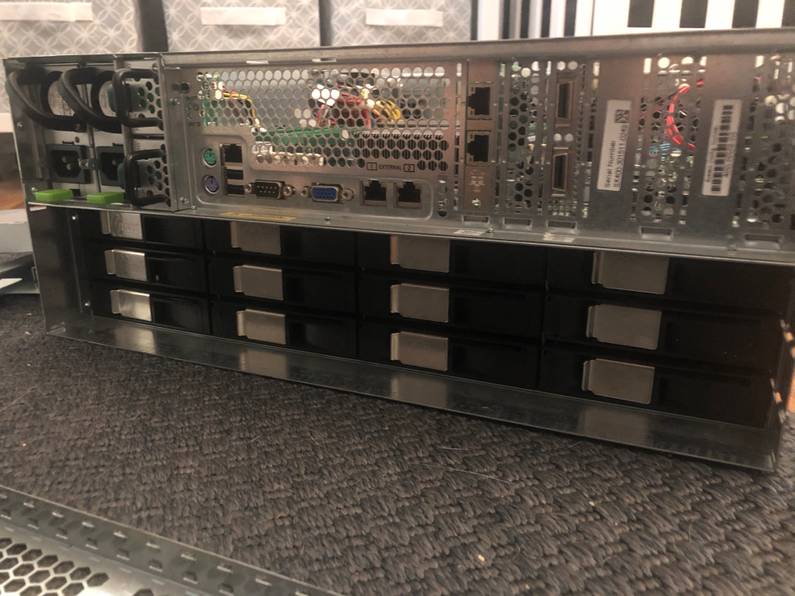
As far as adding storage to my home data center project, I wanted to get something that could easily grow with demand and picked up an Isilon / EMC X400 chassis with a Supermicro X8 series motherboard.
This server is a 4 unit rack mount which is what I had left of the 12 units on the rack that I bought a few weeks ago.
It has room on the front panel for 24 3.5” HDDs which are all behind a face plate to keep things looking nice.
On the back it has space for another 12 3.5” HDDs on the lower half of the chassis, with the top half of the unit exposing the typical hardware interfaces for the unit.
To populate all of the HDD bays, I found someone selling Hitachi HUS156060VLS600 in lots of 20 each for about $80. This was quite a cheap purchase, but turned out taking a lot of my time getting them to actually work.
The issue with these drives is that they where NetApp specific. This meant that they where formatted to work only on NetApp hardware. This basically means the sector size on each drive was 520 bytes instead of the standard 512.
Now, it is possible to reformat these types of drives, but if you decide on this course of action to save a few dollars like I did, be warned, it can be a significant time commitment based on what hardware you have available to work on the drives.
For me, it was a long involved process which I’ve split out into this separate post in case there are others who are truly interested in jumping down that rabbit hole. NetApp drives tend to be cheaper so if you manage to get to a point where you can format them, it means that you can buy enterprise grade drives very cheap. As an example, I bought 40 600GB (24TB) for $160 which equates to $6.60 per GB.
After I managed to format all of the drives so that they would work, I loaded up all of the bays on
the X400 I decided to install FreeNAS.
For a system like the X400, it is a common suggestion to store the OS on a smaller drive, not on
one of the bay disks. I have a small, 256GB Samsung USB dongle which is very fast which I decided
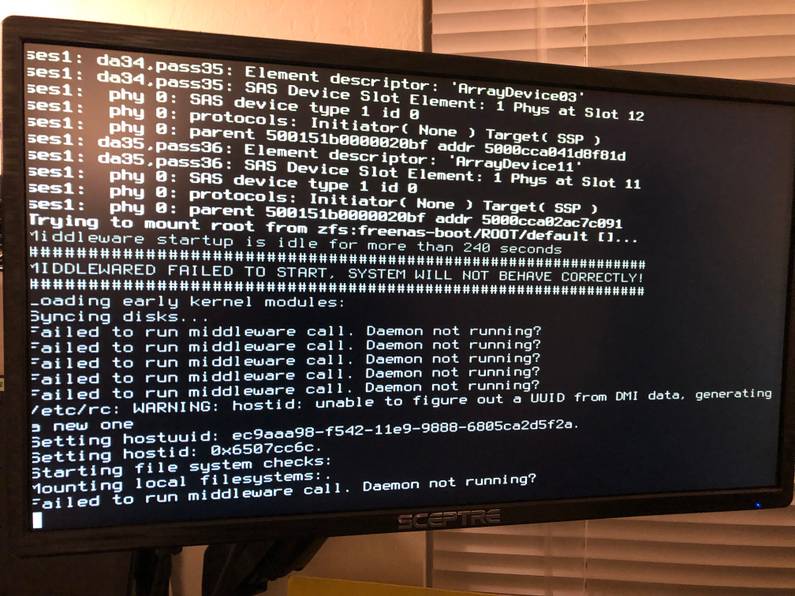
to use for this purpose. Starting FreeNAS on this motherboard turned out to be problematic and I
continued to get errors due to the daemon not starting.
I tried a number of different angles to get this to work, but to no avail. After losing a bit of patience, I decided that installing Ubuntu Server on this machine might make more sense either way to keep it in line with the other servers. Interestingly, after installing Ubuntu Server, I also got some weird errors when booting up, crashing the OS.
This meant that the issue was hardware based. So I started a process of removing all peripherals to the motherboard, getting to a point where I had the motherboard with only power, the USB for the OS, a USB keyboard and a monitor attached.
Installing an OS worked fine, but the installed OS would continually crash. I eventually thought that maybe the issue was with the size of the OS USB drive. Using a 16GB drive, I repeated the install process and horah, everything worked as expected.
I haven’t been able to find out anything online, but it appears that the X8 motherboard has issues with either that particular USB dongle, or it’s size. Either way, given the time I’d spent on the issue already, I moved on quickly!
After setting up a RAID configuration across all the disks, installing Kubernetes and adding this
server to the cluster (I ended up sticking with Ubuntu) I then exposed the disks to the cluster in
the same way I did on my previous Kubernetes project
(discussed here). A quick test of this
setup proved everything worked, with my Kubernetes deployments on the existing servers being able
to request NFS storage and the X400 being able to dynamically provision the required storage and
make it available much like the acepc in my previous project was able to.
Working through these issues took considerable time and effort but it’s always a great feeling and all the more worth it when you manage to overcome them. Persistence is a virtue and working difficult problems only helps you learn how to overcome more difficult issues in future. There is a delicate balance of when to stick and when to quit, but my personal view is too many people quit too early, or when things go beyond their comfort or experience level. If you quit at the same point everyone else does, what are you really expecting to get out of anything you do?
One issue does remain though, that of the level of sound that the X400 makes which is the next
thing I’m going to try and solve over the next week or two.

