Home Data Center Project: Setting up a VMware vSphere ESXi 6.7 on Dell R610
The following is part of a series of posts called "Building a data center at home".
Living in the SF bay area, you can acquire 2nd hand data center equipment relatively cheap. The following are a series of posts detailing my deep dive in building a cluster with data-center equipment at home (often called a homelab) which consists of 48 CPU cores, 576Gb RAM, 33.6TB storage across 60 x 6Gb/s HDD's with a combined weight of just over 380lb/170kg within a budget of $3000.
- Home Data Center Project: Starting the build - 7 September 2019
- Home Data Center Project: Adding a storage server - 21 September 2019
- Home Data Center Project: Formatting NetApp drives for normal use - 21 September 2019
- Home Data Center Project: Reduction of noise on Isilon X400 - 28 September 2019
- Home Data Center Project: Wiping and configuring Force10 switch - 5 October 2019
- Home Data Center Project: Load balancing multiple ethernet ports - 26 October 2019
- Home Data Center Project: Setting up a VMware vSphere ESXi 6.7 on Dell R610 - 6 November 2019
- Home Data Center Project: Persistent kernel panic and upgrading R710 BIOS - 23 November 2019
- Home Data Center Project: Finished System - 29 November 2019
At this point in with my home data-center project, I figure that I already have quite a bit of
resources for running Kubernetes, so I decided to break out the individual R610 to serve a
different data-center concern, that of virtualization.
The obvious choice (based on my very little experience in these matters) appears to be vSphere. It does seem to be the main software which is used for this task, at least at a homelab level. It also appears that Kubernetes can interface with vSphere for storage which could be helpful for storage and might be worth investigating in future.
Install
I downloaded the ISO from VMware’s site. Their website authentication works terribly for a company of their maturity. I couldn’t enter my password in the log in because it didn’t match the password quality requirements, even though it worked when I signed up. Also they use browser session storage for authentication token storage which makes things difficult to work with as well…
I use etcher to create USB, etcher complains that the image doesn’t have a partition and is
therefore likely not bootable. I’m going to trust that ISO is valid, I boot up the R610 via the
USB and it all seems to work fine.
The setup for ESXi is pretty clean and informative compared to other OS installers and for what it is doing, it quite quick. There aren’t many options for setting dedicated IP’s or similar install tasks, but I guess that this is likely something that can be configured after the OS is installed.
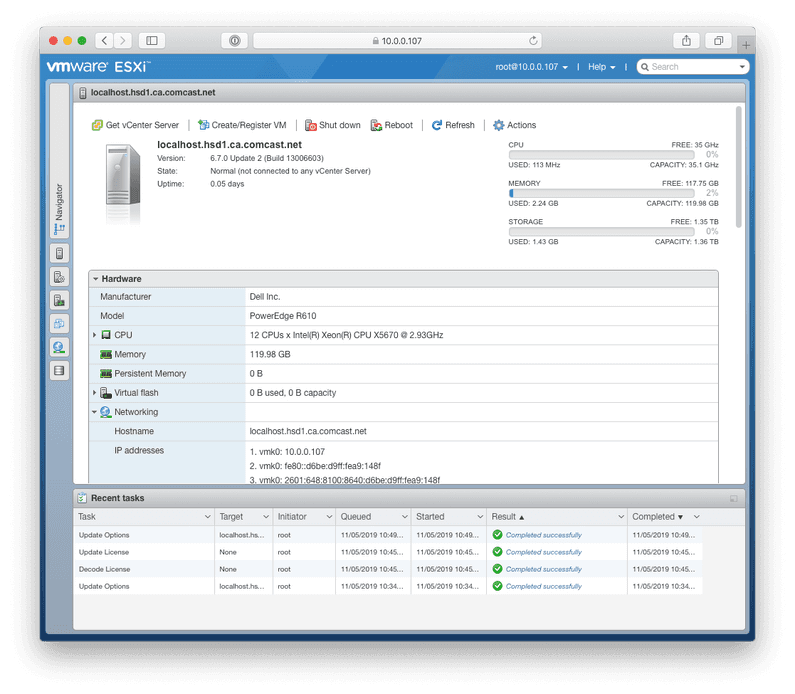
I remove the installation media and restart. The server restarts and after I change the boot mode to UEFI, ESXi starts up. Wow, this is a pretty easy process, so far. After getting setup, the output shows a number of IP addresses that can be used to manage the host. I visit the IP in Chrome but get issues with the certificate being revoked. Unsure what the issue is there, the certificate being ‘revoked’ is an interesting issue given that this is a new install. Either way, opening in Safari works fine.
First boot
Logging in is a simple case of using the password that was set up during the installation.
Once logged in the 60 day trial can be removed with a licence from
this link and found in the GUI under
Manage > Licensing
For a piece of software that you would expect to be for super users, this whole process has been impressively sleek and easy to implement so far. Time to load the first VM.
Installing a Windows instance
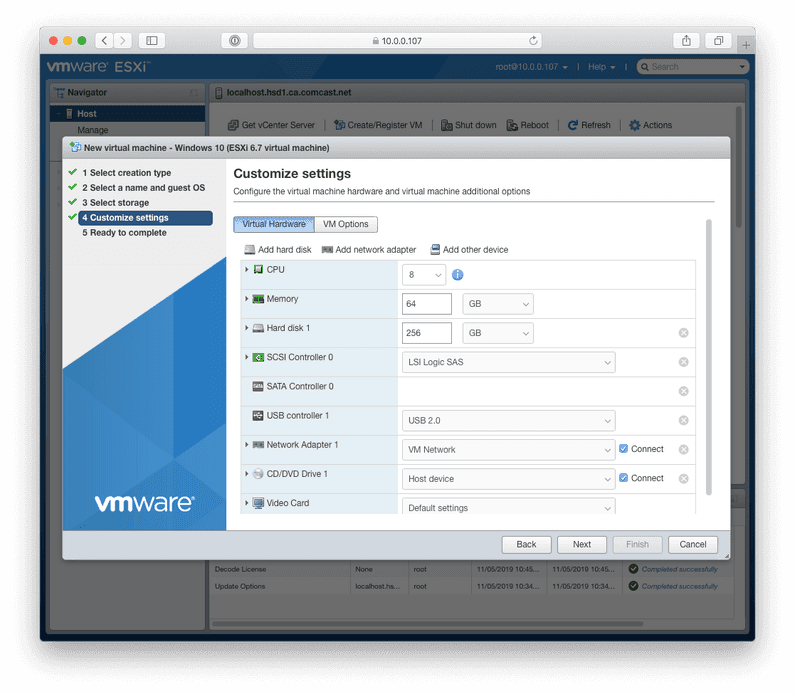
To register a new instance I click the Create / Register VM and select
Create a new virtual machine in the following options. I can then choose the specifications for
this VM and while I have 12 cores on this machine, only 8 are allowed per VM due to using a free
licence. I give this VM half of the available memory I have and select 64GB just to see what the
performance is like once everything is running.
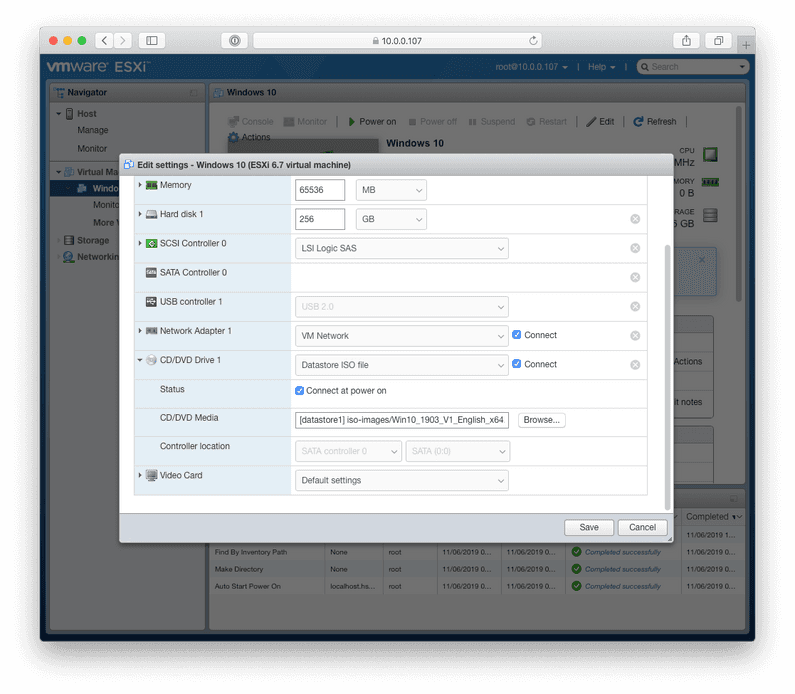
From this new VM’s control page, I need to set up an ISO to load as a CD / DVD image, basically as if to ‘install’ Windows on this VM with a DVD disk.
To do this, the appropriate image needs to be uploaded and set as the image for the drive. It’s a
pretty simple process of ‘editing’ the setting of the VM while it is in the off state. From here,
you upload the image (I stored the ISO in a directory called iso-images which I’ll use for future
ISO files as well) and then selecting that file. Also selecting Connect at power on is a good
idea so that the VM boot sequence picks up the virtual drive.
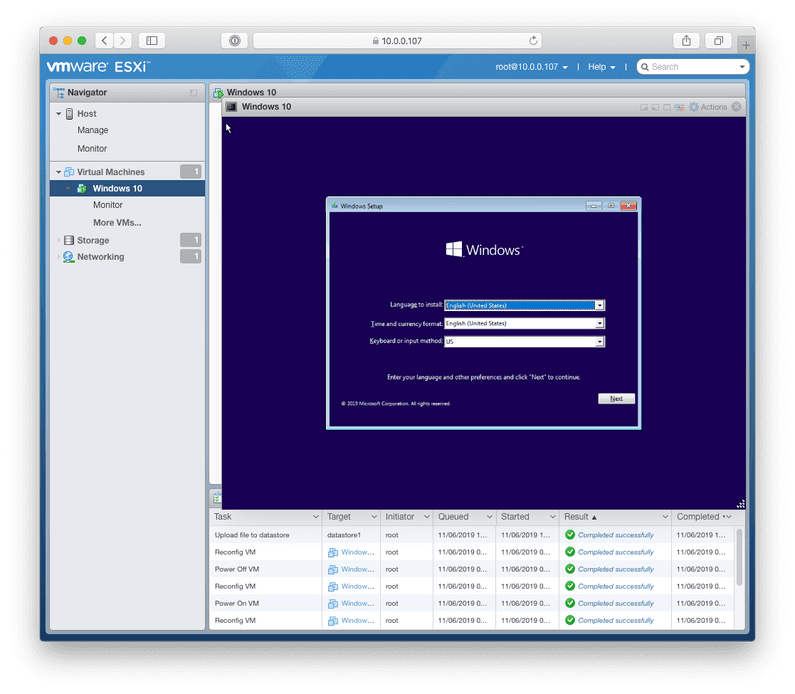
Saving the changes and then starting the VM, the initial boot sequence fails as it appears as though the VM boot sequence doesn’t automatically try the DVD drive. A boot selection screen appears after some time and allows the selection of the DVD drive. Selecting this option immediately starts the installation.
The installation works the same as a typical hardware install, license key, license agreement, format drive and then the install proper while being shown all the other opt-in / opt-out screens.
Sidenote: I haven’t installed Windows for a long time and am surprized by the number of options the install makes you answer now. I believe the less ‘onboarding’ an OS has when installing the better, and the personification of the install process for Windows continues to feel more and more weird. An OS is not a person, or a group doing things ‘for you’. Hope they move away from the ‘I’m’ and ‘We’re’ in the messaging in future. Anyhow…
After the process completes, Windows starts as normal, but using the interface via the web GUI isn’t really a suitable solution. VMware make available Remote Console for this exact use case and it’s a very simple process to install on Mac. They even provide a link within the ESXi GUI for it.
Once installed it’s just a case of selecting Launch Remote Console from the console menu in the
ESXi GUI. Remote Console is pretty performant compared to many other remote clients I’ve had
experience with over the years, but again, my experience isn’t very extensive. The main thing is,
that there is very little lag, meaning that the OS is actually usable.
Wrap up
For only about $100 (the cost of the R610), I now have a significant workhorse computer that can
be used for desktop work. I have yet to run any tests as far as processing speed for a given VM,
but I’ll try and get something together for a future post.
I also added an Ubuntu VM as I use the desktop version for certain purposes at times, and using two Remote Consoles concurrently doesn’t appear to be an issue. In fact, I’ve found that it is more responsive when run in full screen which suits my workflow as I use multiple MacOS desktops and switch between them while working. This allows me to effectively switch between operating systems instantaneously.
My monitor is 4k and while I still haven’t figured out how to get the VMs to run at that resolution, the results are still pretty impressive and useable.


