Creating a bare-bones on premises Kubernetes cluster from old hardware
The following is part of a series of posts called "Repurposing old equipment by building a Kubernetes cluster".
While old equipment by itself is in general not very useful unless you find a particular use case, by combining a number of old devices you can build a more powerful system that can span perhaps a number of use cases. Kubernetes is a perfect candidate to be able to do this. I had a number of old laptops laying about and decided to test this theory out.
- Creating a bare-bones on premises Kubernetes cluster from old hardware - 30 August 2019
- Adding persistance to on premises Kubernetes cluster - 1 September 2019
- Adding Helm to on premises Kubernetes cluster - 2 September 2019
- Adding an Ingress to on premises Kubernetes cluster without load balancer - 2 September 2019
- Adding Jenkins to on premises Kubernetes cluster via Helm - 4 September 2019
- Adding Prometheus to on premises Kubernetes cluster via Helm - 4 September 2019
I’ve alway been interested in finding ways to utilize old hardware which I no longer use as my needs grow. I never actually throw any hardware away unless I can not absolutely find a use for it and as such, have 4 old laptops that I hack on often. I’ve been using Kubernetes for a number of years but have very little experience in actually administering it, apart from the really early days (v1.1 and such) where using Kubernetes actually required you to provision your own clusters. Things have progressed a very long way since then and so I figured that this would be a good project to get back into Kubernetes provisioning and seeing how it works in 2019. Hey, I’ll also end up with a Kubernetes cluster that I can use for all kinds of things as well.
Background on equipment.
So just to give you an idea for how deprecated some of these computers are, here is a quick introduction as to what I’m using.
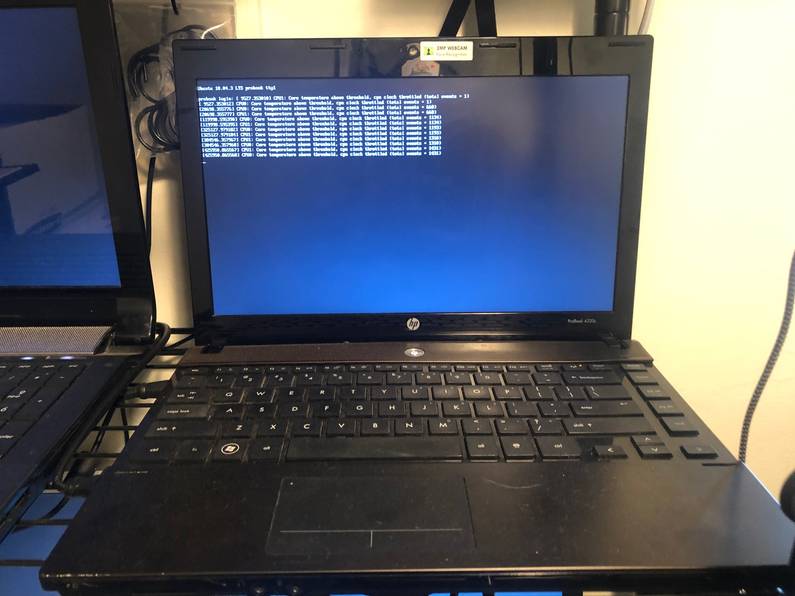
probook
Perhaps the oldest of all the devices. 2GB memory with a dual core. Close to 10 years old. Was a solid beast back in the day, traveled with this through Europe and the states with it and it never skipped a beat. Unfortunately these days, it will turn off under and significant load due to temperature issues.
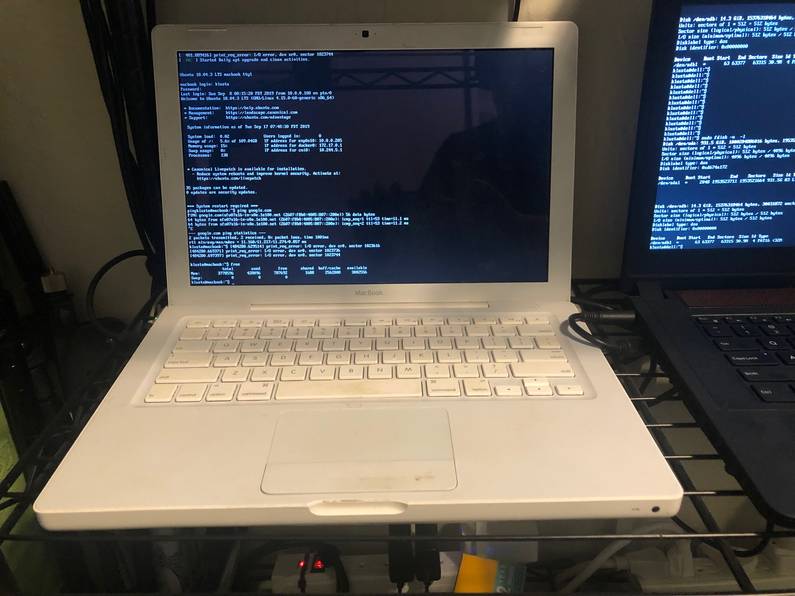
macbook
Probably as old as probook. 4GB memory and not really sure of the other specs. Again, another
solid piece of hardware. I previously used this as part of a DAW setup and it held its own. Dropped
it a number of times and it faired much better than a current Macbook would…
asus
A bit of a beast I picked up and never really utilized much. 8GB + quad core I believe.
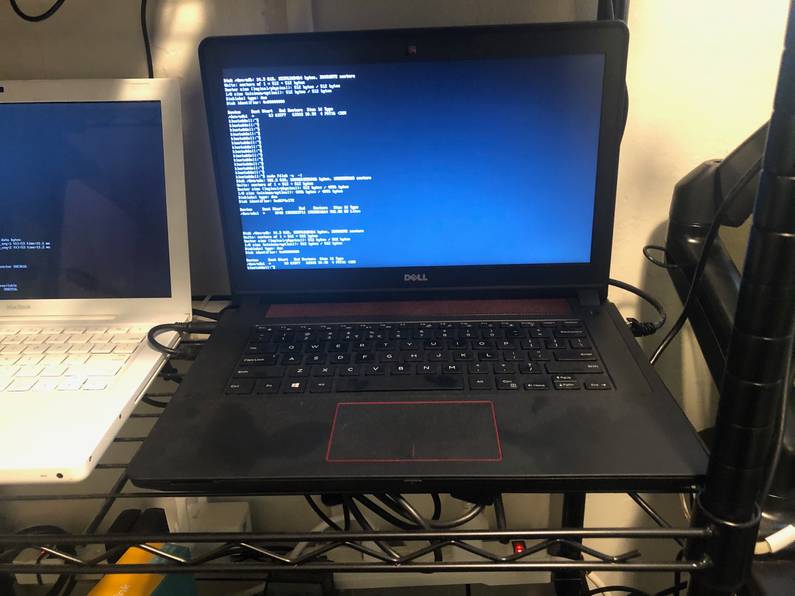
dell
Bought this for gaming in about 2016. 16GB + quad core, got an integrated video card in there too which might be interesting to try and get exposed to the Kubernetes cluster once it’s up and running.
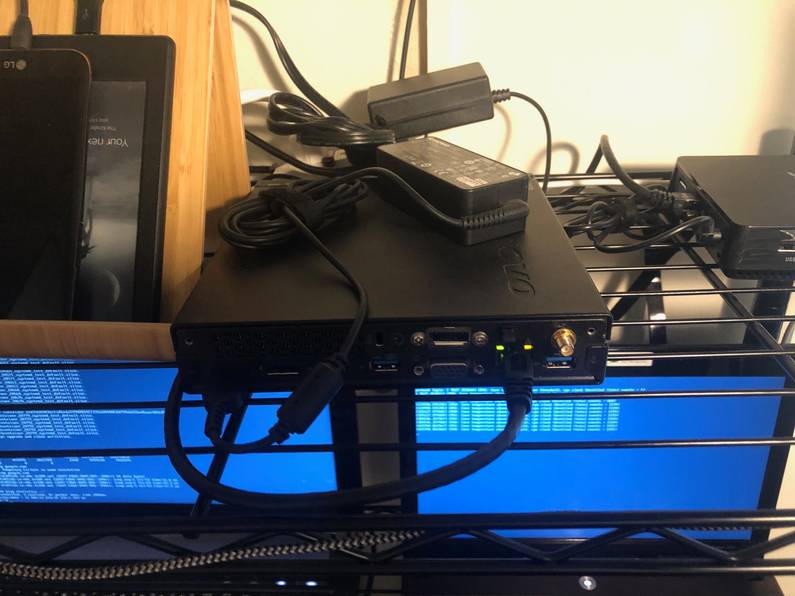
lenovo
A small form factor but pretty powerful 16GB quad core.
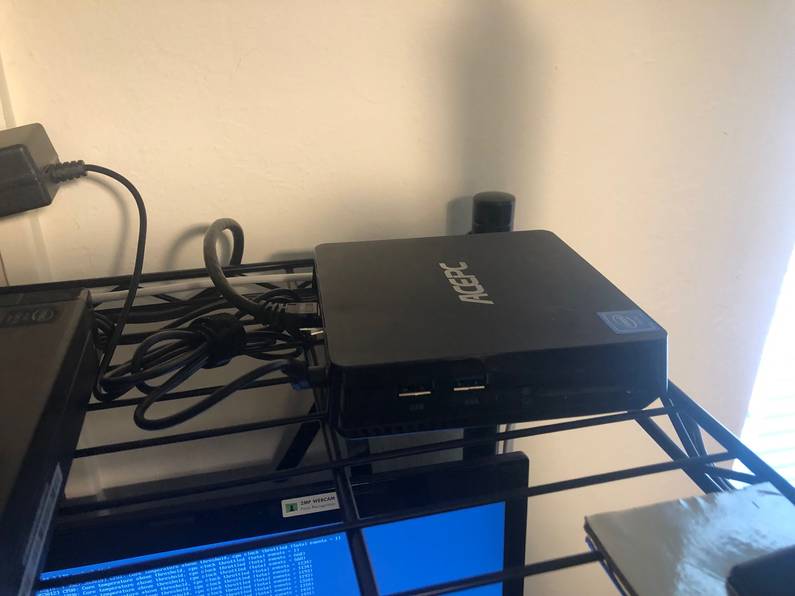
acepc
This is one of those newer styled mini fanless PC’s that cost $100 - $200. Has an atom processor on board with 4GB. Runs windows like a champ. If you’re looking for something for just word processing etc, grabbing one of these is a great idea.
Putting it all together
Living in the Bay area, space is tight, so I’ve managed to get everything set up on a single set of shelves which also houses a bunch of other tech and another computer or two. I’ve bought 2 cheap tp-link 5-port switches as well and hooked everything up via ethernet as doing everything over the WiFi network seems like a bad idea, and setting up ethernet connections is way easier too.
Getting everything ready
While CentOS or RHEL is likely a better candidate for the underlying OS as this is more likely the choice in a typical data centre, I’m going to stick with Ubuntu just for the sake of familiarity and to so I can isolate Kubernetes issues easier than mixing them with any unfamiliar OS issues.
I create an Ubuntu 18.04 server USB drive and install it on each device. Everything runs pretty smoothly, even in the case of macbook which is the first time I’ve actually fully wiped a mac with Linux. Interesting to note as well that the well known mac chime is still there when booting up macbook as I guess it is embedded into the boot loader.
Once all devices were full booted it was time to start working on each. Going to be easier doing this at my desk so I quickly jump on each one and collect their IP addresses.
$ ifconfig
docker0: flags=4099<UP,BROADCAST,MULTICAST>  mtu 1500
        inet 172.17.0.1  netmask 255.255.0.0  broadcast 172.17.255.255
        ether 02:42:8f:11:6c:37  txqueuelen 0  (Ethernet)
        RX packets 0  bytes 0 (0.0 B)
        RX errors 0  dropped 0  overruns 0  frame 0
        TX packets 0  bytes 0 (0.0 B)
        TX errors 0  dropped 0 overruns 0  carrier 0  collisions 0

ens5: flags=4163<UP,BROADCAST,RUNNING,MULTICAST>  mtu 1500
        inet 10.0.0.43  netmask 255.255.255.0  broadcast 10.0.0.255
        inet6 2601:648:8100:8640:9a4b:e1ff:fea3:70d6  prefixlen 64  scopeid 0x0<global>
        inet6 fe80::9a4b:e1ff:fea3:70d6  prefixlen 64  scopeid 0x20<link>
        inet6 2601:648:8100:ff8d::1d35  prefixlen 128  scopeid 0x0<global>
        ether 98:4b:e1:a3:70:d6  txqueuelen 1000  (Ethernet)
        RX packets 152246  bytes 171585821 (171.5 MB)
        RX errors 0  dropped 0  overruns 0  frame 0
        TX packets 56957  bytes 5067144 (5.0 MB)
        TX errors 0  dropped 0 overruns 0  carrier 0  collisions 0

lo: flags=73<UP,LOOPBACK,RUNNING>  mtu 65536
        inet 127.0.0.1  netmask 255.0.0.0
        inet6 ::1  prefixlen 128  scopeid 0x10<host>
        loop  txqueuelen 1000  (Local Loopback)
        RX packets 194  bytes 18600 (18.6 KB)
        RX errors 0  dropped 0  overruns 0  frame 0
        TX packets 194  bytes 18600 (18.6 KB)
        TX errors 0  dropped 0 overruns 0  carrier 0  collisions 0
The Ubuntu installation asks if you would like to install certain packages during install, one being
OpenSSH Server, but be careful with this selection. Almost every time I do the Ubuntu install, I
select OpenSSH server and press Return to select it, but this has the effect of continuing the
install process. No problem, I just run apt-get install openssh-server after install on each
machine.
I can then connect via ssh by simply ssh [email protected], using the ens5 inet ip address above.
I’m now at a point where I have all six devices running Ubuntu server and connected to one another via ethernet.
Locking down IP addresses in place of DHCP
In a rush to get all these servers up and running, I set them up using DHCP for networking. Having dynamically assigned IP addresses on these machines isn’t going to be great as they will lose one another on the network if they renew their DHCP lease and get a new IP.
Initially, I log in to my router and reduce the DHCP range to end at 10.0.0.199 instead of 10.0.0.255. I’ll use 10.0.0.200 and up for static IP addresses for any of these, or future Kubernetes devices.
I then need to assign an IP for each server. This is done firstly by adding the following file, updating the addresses so that they are unique for each server and ensuring that the ens5 is correct for each ethernet device.
$ cat /etc/netplan/99_config.yaml
network:
  version: 2
  renderer: networkd
  ethernets:
    ens5:
      dhcp4: no
      addresses:
        - 10.0.0.200/24
      gateway4: 10.0.0.1
      nameservers:
          search: [otherdomain]
          addresses: [1.1.1.1]
After adding this file simply running netplan apply updates everything (and locks up you session
if you’ve ssh’d into the box).
Installing docker
I want to use docker as the Container Runtime Interface (CRI) just due to familiarity with it. The kubernetes site gives specific instructions found here.
I initially installed docker-ce directly which installed 19.03 but downgrading back to 18.06 was not
difficult just using the apt-get install docker-ce=18.06.2~ce~3-0~ubuntu command. 18.06 is the
version that is recommended for running Kubernetes at the current time so don’t want to take any
chances there. Pretty sure those bugs would be crazy to get to the bottom of if they came up.
Installing kubeadm
For reference, when installing kubeadm,
this documentation
is pretty much absolute required reading.
One warning is that you need to turn off swap. Ubuntu appears to install a swap file by default when
using guided partitioning during installation. I typically do guided as my knowledge on the devops
side is pretty lacking. To check for active swap files on Ubuntu you use the swapon command and
turn them off with swapoff. All 6 devices had swap after installation and I turned them off as
such:
$ swapon -s
Filename				Type		Size	Used	Priority
/dev/dm-1                              	partition	1003516	1036	-2
$ sudo swapoff /dev/dm-1
$ swapon -s
$
The above disables swap for the current session only, but swap will return after reboot, and
kubelet will not be able to start on a given node if swap exists. To remove swap permanently,
edit /etc/fstab and comment the line relating to the swapfile.
Install kubeadm, kubectl and kubelet on all nodes is a pretty quick and painless process and the documentation here is easy to follow. Once done its a good idea to check that all versions were aligned across each device like so.
# apt list kubeadm
kubeadm/kubernetes-xenial,now 1.15.3-00 amd64 [installed]
N: There are 115 additional versions. Please use the '-a' switch to see them.
# apt list kubectl
Listing... Done
kubectl/kubernetes-xenial,now 1.15.3-00 amd64 [installed]
N: There are 118 additional versions. Please use the '-a' switch to see them.
# apt list kubelet
Listing... Done
kubelet/kubernetes-xenial,now 1.15.3-00 amd64 [installed]
N: There are 156 additional versions. Please use the '-a' switch to see them.
# apt list docker-ce
Listing... Done
docker-ce/bionic 5:19.03.1~3-0~ubuntu-bionic amd64 [upgradable from: 18.06.2~ce~3-0~ubuntu]
N: There are 15 additional versions. Please use the '-a' switch to see them.
Setting up control plane node (master node)
To start setting up our Kubernetes cluster I first start with the master node, but prior to instantiating the master, I need to decide on what pod network overlay the cluster is going to use. I’m interested in Calico and Weave Net, but for the simple purposes that I’m planning, Flannel will be sufficient. There is a large selection of network overlay options available with each giving a wide range of different features but Flannel is typically what is seen as the ‘entry-level’ way to go (or at least in my experience).
To set up the master I need to run kubeadm init on the node I want to use, but in order to use
Flannel, when running kubeadm init I need to pass --pod-network-cidr=10.244.0.0/16 and
also set /proc/sys/net/bridge/bridge-nf-call-iptables to 1 by running
sysctl net.bridge.bridge-nf-call-iptables=1 prior to kubeadm init.
I get the following output which also gives some fantastic information as to next steps. It is super refreshing to see output such as this on complex tools such as Kubernetes. I remind myself that I should really be more cognizant of these things when developing my own tools that others will be using.
# sysctl net.bridge.bridge-nf-call-iptables=1
net.bridge.bridge-nf-call-iptables = 1
# kubeadm init --pod-network-cidr=10.244.0.0/16
[init] Using Kubernetes version: v1.15.3
[preflight] Running pre-flight checks
[preflight] Pulling images required for setting up a Kubernetes cluster
[preflight] This might take a minute or two, depending on the speed of your internet connection
[preflight] You can also perform this action in beforehand using 'kubeadm config images pull'
[kubelet-start] Writing kubelet environment file with flags to file "/var/lib/kubelet/kubeadm-flags.env"
[kubelet-start] Writing kubelet configuration to file "/var/lib/kubelet/config.yaml"
[kubelet-start] Activating the kubelet service
[certs] Using certificateDir folder "/etc/kubernetes/pki"
[certs] Generating "front-proxy-ca" certificate and key
[certs] Generating "front-proxy-client" certificate and key
[certs] Generating "etcd/ca" certificate and key
[certs] Generating "apiserver-etcd-client" certificate and key
[certs] Generating "etcd/server" certificate and key
[certs] etcd/server serving cert is signed for DNS names [probook localhost] and IPs [10.0.0.200 127.0.0.1 ::1]
[certs] Generating "etcd/peer" certificate and key
[certs] etcd/peer serving cert is signed for DNS names [probook localhost] and IPs [10.0.0.200 127.0.0.1 ::1]
[certs] Generating "etcd/healthcheck-client" certificate and key
[certs] Generating "ca" certificate and key
[certs] Generating "apiserver" certificate and key
[certs] apiserver serving cert is signed for DNS names [probook kubernetes kubernetes.default kubernetes.default.svc kubernetes.default.svc.cluster.local] and IPs [10.96.0.1 10.0.0.200]
[certs] Generating "apiserver-kubelet-client" certificate and key
[certs] Generating "sa" key and public key
[kubeconfig] Using kubeconfig folder "/etc/kubernetes"
[kubeconfig] Writing "admin.conf" kubeconfig file
[kubeconfig] Writing "kubelet.conf" kubeconfig file
[kubeconfig] Writing "controller-manager.conf" kubeconfig file
[kubeconfig] Writing "scheduler.conf" kubeconfig file
[control-plane] Using manifest folder "/etc/kubernetes/manifests"
[control-plane] Creating static Pod manifest for "kube-apiserver"
[control-plane] Creating static Pod manifest for "kube-controller-manager"
[control-plane] Creating static Pod manifest for "kube-scheduler"
[etcd] Creating static Pod manifest for local etcd in "/etc/kubernetes/manifests"
[wait-control-plane] Waiting for the kubelet to boot up the control plane as static Pods from directory "/etc/kubernetes/manifests". This can take up to 4m0s
[kubelet-check] Initial timeout of 40s passed.
[apiclient] All control plane components are healthy after 51.004599 seconds
[upload-config] Storing the configuration used in ConfigMap "kubeadm-config" in the "kube-system" Namespace
[kubelet] Creating a ConfigMap "kubelet-config-1.15" in namespace kube-system with the configuration for the kubelets in the cluster
[upload-certs] Skipping phase. Please see --upload-certs
[mark-control-plane] Marking the node probook as control-plane by adding the label "node-role.kubernetes.io/master=''"
[mark-control-plane] Marking the node probook as control-plane by adding the taints [node-role.kubernetes.io/master:NoSchedule]
[bootstrap-token] Using token: s84v9j.teuvc4z4xw5jinbr
[bootstrap-token] Configuring bootstrap tokens, cluster-info ConfigMap, RBAC Roles
[bootstrap-token] configured RBAC rules to allow Node Bootstrap tokens to post CSRs in order for nodes to get long term certificate credentials
[bootstrap-token] configured RBAC rules to allow the csrapprover controller automatically approve CSRs from a Node Bootstrap Token
[bootstrap-token] configured RBAC rules to allow certificate rotation for all node client certificates in the cluster
[bootstrap-token] Creating the "cluster-info" ConfigMap in the "kube-public" namespace
[addons] Applied essential addon: CoreDNS
[addons] Applied essential addon: kube-proxy

Your Kubernetes control-plane has initialized successfully!

To start using your cluster, you need to run the following as a regular user:

  mkdir -p $HOME/.kube
  sudo cp -i /etc/kubernetes/admin.conf $HOME/.kube/config
  sudo chown $(id -u):$(id -g) $HOME/.kube/config

You should now deploy a pod network to the cluster.
Run "kubectl apply -f [podnetwork].yaml" with one of the options listed at:
  https://kubernetes.io/docs/concepts/cluster-administration/addons/

Then you can join any number of worker nodes by running the following on each as root:

kubeadm join 10.0.0.200:6443 --token s84v9j.teuvc4z4xw5jinbr \
    --discovery-token-ca-cert-hash sha256:6db33acf26ab9f3ce1f6e8424a1e041230b02fc87bcfdde65b9cb6aca3338063
I create my users admin.conf file as described in the output, and then install Flannel. This is
basically a process of creating a number of containers on the existing daemon via the familiar
kubectl apply call. The concept that Kubernetes add-ons and tools are pretty much the same as any
other container you’d run on the cluster is another reason that I think so highly of Kubernetes.
$ kubectl apply -f https://raw.githubusercontent.com/coreos/flannel/62e44c867a2846fefb68bd5f178daf4da3095ccb/Documentation/kube-flannel.yml
podsecuritypolicy.extensions/psp.flannel.unprivileged created
clusterrole.rbac.authorization.k8s.io/flannel created
clusterrolebinding.rbac.authorization.k8s.io/flannel created
serviceaccount/flannel created
configmap/kube-flannel-cfg created
daemonset.extensions/kube-flannel-ds-amd64 created
daemonset.extensions/kube-flannel-ds-arm64 created
daemonset.extensions/kube-flannel-ds-arm created
daemonset.extensions/kube-flannel-ds-ppc64le created
daemonset.extensions/kube-flannel-ds-s390x created
After a brief wait, I can see that all containers have started and are up apart from
quay.io/coreos/flannel which appears to do a cp command so assume this is an initialization
specific container.
At this point I’ve got a single node Kubernetes cluster up and running. Time to start clustering!!!
Connecting worker nodes
The next step is to set up the other computers to join the master node. The instructions for this were given when I previously initialized the control plane on the master node.
# kubeadm join 10.0.0.200:6443 --token s84v9j.teuvc4z4xw5jinbr --discovery-token-ca-cert-hash sha256:6db33acf26ab9f3ce1f6e8424a1e041230b02fc87bcfdde65b9cb6aca3338063
[preflight] Running pre-flight checks
[preflight] Reading configuration from the cluster...
[preflight] FYI: You can look at this config file with 'kubectl -n kube-system get cm kubeadm-config -oyaml'
[kubelet-start] Downloading configuration for the kubelet from the "kubelet-config-1.15" ConfigMap in the kube-system namespace
[kubelet-start] Writing kubelet configuration to file "/var/lib/kubelet/config.yaml"
[kubelet-start] Writing kubelet environment file with flags to file "/var/lib/kubelet/kubeadm-flags.env"
[kubelet-start] Activating the kubelet service
[kubelet-start] Waiting for the kubelet to perform the TLS Bootstrap...

This node has joined the cluster:
* Certificate signing request was sent to apiserver and a response was received.
* The Kubelet was informed of the new secure connection details.

Run 'kubectl get nodes' on the control-plane to see this node join the cluster.
Its worth noting that if I want to add further machines in future I can regenerate this command via
kubeadm token create --print-join-command. This will generate a new token as these tokens have a
TTL of an hour from what I gather.
After running the join command on all devices, I return to the master node and check that all nodes are available and everything seems in place and working!
$ kubectl get nodes
NAME      STATUS   ROLES    AGE     VERSION
acepc     Ready    <none>   3m24s   v1.15.3
asus      Ready    <none>   3m48s   v1.15.3
dell      Ready    <none>   3m32s   v1.15.3
lenovo    Ready    <none>   3m41s   v1.15.3
macbook   Ready    <none>   3m17s   v1.15.3
probook   Ready    master   7m43s   v1.15.3
Fantastic!
Control node isolation
By default, Kubernetes ‘taints’ your master node to avoid having pods scheduled. In my case however, my purposes are not mission critical or production grade and I want to squeeze as many cycles out of this hardware so removing this taint seems like a good idea (just make sure if you do this yourself it can open security issues).
$ kubectl taint nodes probook node-role.kubernetes.io/master-
node/probook untainted
Connecting to the cluster
While I can ssh to the different cluster nodes, there is no way for me to interact with the cluster
directly from my main machine. The common method for this is to scp the /etc/kubernetes/admin.conf
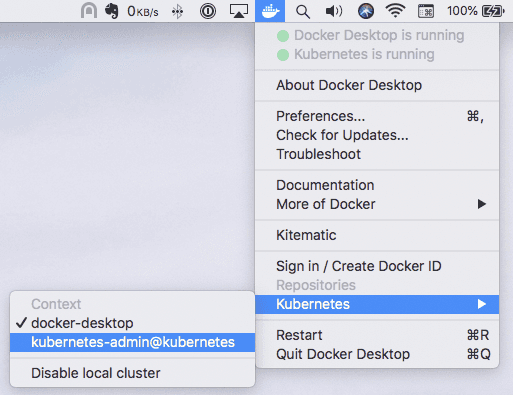
to your local machine and then use kubectl referencing that config, but with kubernetes enabled
in Docker for Desktop on mac, I can set up various contexts in my ~/.kube/config and easily
switch between them.
Copying the cluster, context and user sections from /etc/kubernetes/admin.conf amd adding them to
the existing configs that I have in ~/.kube/config I can now switch the context kubectl runs in
quickly and easily via the Docker status bar icon.
Dashboard
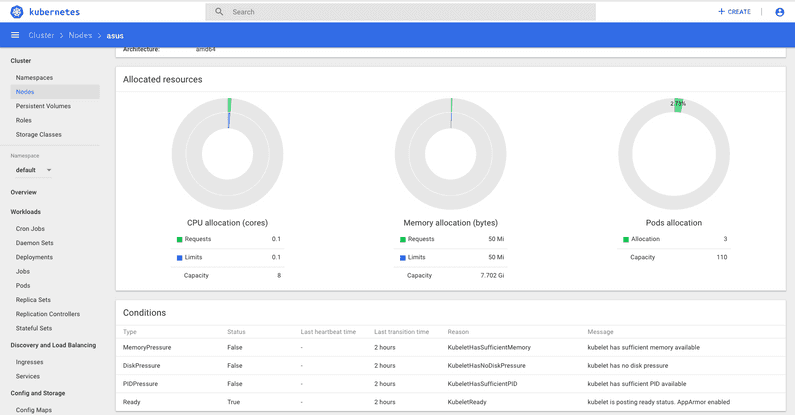
While its rare to use a UI for managing Kubernetes, having one on my local cluster to see allocations and performance metrics will be useful.
To get the Kubernetes dashboard up and running I first apply its configuration as so:
$ kubectl apply -f https://raw.githubusercontent.com/kubernetes/dashboard/v1.10.1/src/deploy/recommended/kubernetes-dashboard.yaml
secret/kubernetes-dashboard-certs created
serviceaccount/kubernetes-dashboard created
role.rbac.authorization.k8s.io/kubernetes-dashboard-minimal created
rolebinding.rbac.authorization.k8s.io/kubernetes-dashboard-minimal created
deployment.apps/kubernetes-dashboard created
service/kubernetes-dashboard created
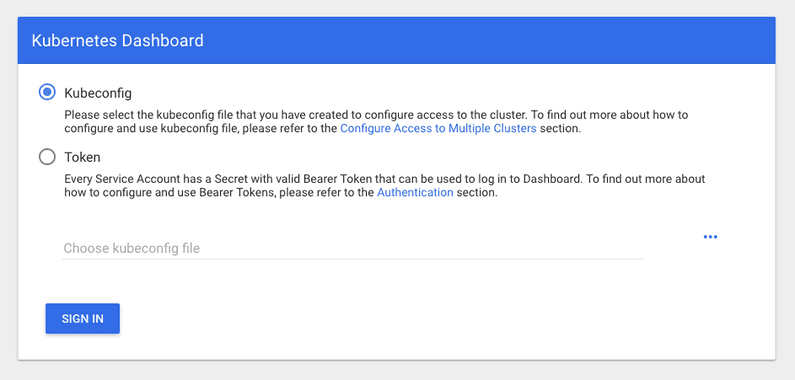
I then start the kubectl proxy on my main workstation and visit
http://localhost:8001/api/v1/namespaces/kube-system/services/https:kubernetes-dashboard:/proxy/
and get the initial Dashboard screen. And there it is folks, my first actual UI for this cluster!
I then need to set up role based access control (RBAC) for accessing the dashboard via a token. To do this I can simply apply the following config.
$ cat rbac.yml
apiVersion: v1
kind: ServiceAccount
metadata:
  name: admin-user
  namespace: kube-system
---
apiVersion: rbac.authorization.k8s.io/v1
kind: ClusterRoleBinding
metadata:
  name: admin-user
roleRef:
  apiGroup: rbac.authorization.k8s.io
  kind: ClusterRole
  name: cluster-admin
subjects:
- kind: ServiceAccount
  name: admin-user
  namespace: kube-system

$ kubectl apply -f rbac.yml
serviceaccount/admin-user created
clusterrolebinding.rbac.authorization.k8s.io/admin-user created
Once this user is created I can get the bearer token as so:
$ kubectl -n kube-system describe secret $(kubectl -n kube-system get secret | grep admin-user | awk '{print $1}')
Name:         admin-user-token-b6t8r
Namespace:    kube-system
Labels:       <none>
Annotations:  kubernetes.io/service-account.name: admin-user
              kubernetes.io/service-account.uid: 4698687d-60b5-4873-baf0-3105d1d724b6

Type:  kubernetes.io/service-account-token

Data
====
token:      eyJhbGciOiJSUzI1NiIsImtpZCI6IiJ9.eyJpc3MiOiJrdWJl06YWRtaW4tdXNlciJ9.tXi2Xv_Ed51zjYDtRNoWyv9Z-PjpTrTslA
ca.crt:     1025 bytes
namespace:  11 bytes
We can then add this into the dashboard login screen and open sesame, I’m in.
Wrap up so far
I originally started using Kubernetes in early 2016 at version v1.1 and foolishly decided to deep dive and provision my own servers when I started as opposed to using GKE which was the only available platform at the time.
Provisioning back then was a difficult task to say the least. Kubernetes came with pre-designed script to provision against different IaaS providers but as you can imagine, this was often an task wrought with many abstract errors and difficulties.
The ease of provisioning Kubernetes 3.5 years later in 2019 is amazingly simple comparatively. After only a few hours I’ve manged to set up a cluster on a ugly mix of old hardware.
This cluster has 50GB of RAM and 18 cores so it should be able to handle a number of different tasks quite easily.
I’m not finished as yet though, for this cluster to be useable, it needs persistance for future services and cover this off in the next post.
